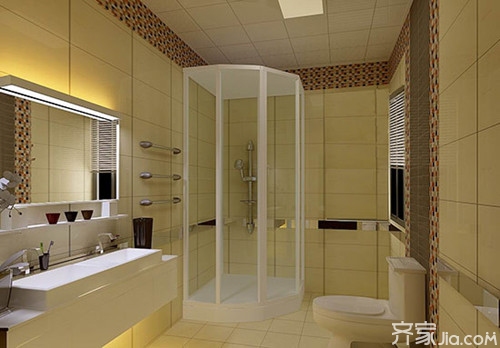
Bathroom waterproofing works are not done well, leaving a lot of hidden dangers for home improvement. Of course, waterproof can prevent some leakage due to the defects of the construction quality itself. Generally, the bathroom will undergo a closed water test during the decoration process. However, after the completion of the project can not ignore the acceptance, all the bathrooms must be carried out one by one acceptance. Following the small series to see the bathroom waterproof construction specifications for your reference.

Toilet waterproof construction specification
1. Confirm the construction address and specify the construction content.
2. Place materials and tools properly after arrival, and must not affect the construction and passage of other types of work.
3. Enter the site and ask the owner to determine the scope of construction and measure the construction area in time. Please confirm and sign the owner.
4. Clean up the debris and oil on the site (a large area can not be removed as a layer of waterproof mortar), so that timely garbage into the bag. If no garbage bags are prepared at the site, the cleaned debris should be piled up neatly. The stacking point should be more than 2 meters from the entrance of the waterproof room
5. Before clearing the site, check whether the sewers in the room are open. If there are abnormalities such as blocking, slowing, and unsmoothing, it should be promptly reported to the owner and the company.
6, cleared up. Check and determine the details of the construction site (wall material, solid hollow floor, corners and internal corners, wire conduits, wall holes, construction ducts, flue ducts, floor drains, drain duct openings) must not be missed.

7, clear the details of the site, clear empty drum layer, remove the impact of tiling protrusions (local small area), repair the defective wall (a small part can be repaired), pipe chisel.
8. The detailed parts shall be constructed in advance to close the roots of the drainage troughs, holes and through-wall pipelines.
9. Scour the ground and clear the water in time. The flushed water must not flow out of the construction area to prevent leakage and downstairs. To achieve no dust, no sand, no debris, after cleaning the walls and the ground, the pipeline irrigation flushing to prevent pipe plugging.
10. To carry out large-scale construction, in accordance with the principle of first constructing the wall surface behind the ground, there shall be no construction omission.
11, along the body of the body along the processing, according to the existing material on the site plus water stop along the body, a high degree of satisfaction with the test conditions (full bathroom floor water coverage) is best not affect the door stone paving.
12. The construction is completed. Finally, the overall inspection of the waterproof layer construction flaws, to ensure that no problems with the construction process.
13. Clean up the tools. In principle, clean water should not be spilled in the room to prevent leakage into the room below.
14. Before leaving the site, if there is no other construction personnel, the water diversion valve, total water valve, main power switch and doors and windows must be closed.
Bathroom waterproofing acceptance considerations

1, the original waterproof layer is damaged
After the renovation is completed, check whether the bathroom is waterproof according to the relevant regulations, and whether the original waterproof layer will cause leakage. The waterproof layer is easily damaged when the floor is redecorated. If it is not repaired in time, leakage will occur in the future, affecting neighbors. Therefore, in the decoration should pay attention to protect the waterproof layer, if accidentally damaged, repair in time to avoid hidden dangers.
2ã€Whether the floor tile is waterproof on the floor
If the original floor tiles of the bathroom need to be replaced, the ground must be leveled with a cement mortar first, and then the waterproof treatment should be done so that the leakage of the waterproof coating due to uneven thickness can be avoided. Before doing waterproofing, be sure to clean the floor and apply 2 to 3 times repeatedly with a polyurethane waterproof coating. The upper and lower water pipes in the bathroom shall be well cemented. The polyurethane waterproof coating shall be brushed from the ground up to 10 to 20 cm, and then the floor shall be redone with polyurethane waterproofing. The original waterproof layer shall form a composite waterproof layer to enhance the waterproofness.
3ã€Whether the wall is waterproof
When the bathroom takes a bath, the water will splash on the adjacent wall. If there is no protection of the waterproof layer, the partition wall and the diagonal corner wall will become mildly damp. So be sure to waterproof the walls before you apply the wall tiles. In the general waterproofing process, the wall surface is to be waterproofed to a height of 30 cm. However, for a non-load-bearing light body wall, the entire wall should be waterproofed.
4ã€Whether the water pipe in the wall is waterproof
During the construction process, when the pipeline, floor drain, etc. cross the floor, the waterproof layer around the hole must be seriously constructed. Buried water pipes in the wall, so that a reasonable layout, the laying of water pipes shall be greater than the diameter of the groove, smooth plaster groove, and then brush the groove in the polyurethane waterproof coating.
Editor's summary: As for the precautions for the construction of the bathroom's waterproof construction, I will briefly introduce it here. I hope to help you, and more information on the decoration will be provided on this site. Stay tuned.
Bathroom waterproof bathroom waterproof material
Single Cold Faucet,Modern Kitchen Faucets,Single Hole Kitchen Faucet,Single Handle Kitchen Faucet
AIHUI Sanitary Ware , https://www.fsaihuisanitary.com