1 Introduction
In gear machining, the caries process has traditionally been considered to be only a method of surface finishing of hardened gears, mainly used to improve the tooth surface finish. However, in recent years, in industrialized countries such as Switzerland and Germany, the precision grinding of the honing wheel has been carried out by using a high-precision gear-type diamond-shaped shaping roller, so that the precision of the dent grinding is greatly improved, so that the dent toothing process is widely applied to the hard tooth surface. The final finishing process of the gear. Although the dental caries process has the advantages of high efficiency, low cost, simple machine structure and convenient operation, it has not been widely used in the finishing of hard tooth gears in China. Based on the analysis of the shaping mechanism of the inner and outer honing wheels of the gear-type diamond shaping roller, the self-made diamond shaping roller was used to carry out the shape modification and caries test, and achieved good results.
2 caries principle and honing wheel modification mechanism
The caries processing is a tooth surface finishing method in which the gear-shaped honing wheel and the quilt gear are freely meshed (corresponding to a pair of crossed-axis helical gear transmissions), and the boring is performed by the relative sliding speed and pressure between the tooth faces. The base material of the honing wheel is a synthetic resin or an artificial rubber having a surface which is uniformly dense with sharp abrasive grains and has a certain elasticity. The cutting effect of the multi-blade tool is honed, the tooth surface burn and crack are not easily generated, and the machined surface with fine cutting lines and low surface roughness value can be obtained. According to the shape and meshing mode of the honing wheel, the molars can be divided into external gear-shaped molars, internal gear-shaped molars and worm-shaped molars. Since the inner and outer gear-shaped molars are widely used in actual production, this paper only tests and analyzes these two methods.
The gear type diamond shaping roller is a high-precision shape-cutting tool made of a layer of diamond particles coated on the tooth surface of the gear-shaped steel base. It can be used for precision shaping of gear grinding tools such as grinding wheels and honing wheels. It is the most difficult to manufacture in various high-precision and complex surface super-hardening repairing rollers. The manufacturing error is transmitted through the secondary processing and enlarged onto the workpiece. The gear-type diamond shaping roller has the same modification method to the internal honing wheel as the workpiece processing method, except that the shaping roller is used to replace the workpiece, and the tooth surface and the root of the honing wheel are trimmed. The dressing time is the same as the time of honing the workpiece. The honing wheel speed is lower than the processing speed, and the dressing amount is 0.01~0.05mm each time. The honing wheel can be adjusted to obtain better precision and self-sharpness.
The meshing principle of the shaping method is the principle of the double enveloping surface of the involute surface, that is, the involute surface of the tooth surface of the shaping roller is used as the mother surface, and the tooth surface of the grinding wheel is modified (enveloped), and then the honing wheel is used. The tooth surface is machined (enveloped) out of the tooth surface of the workpiece. The shape is the first envelope and the second envelope is processed. According to the theoretical analysis of gear meshing, the contact between the tooth faces during the shaping and machining is a line contact, and the point contact of the non-helical gear transmission can make the cutting force distribution more uniform; during the secondary envelopment, between the honing wheel and the workpiece For double-line contact, the first contact line is the reappearance of the contact line at the first envelope (referred to as the original contact line), and the second contact line is due to the secondary contact at the points on the deformed wheel tooth surface at the meshing area. Formed by action (called a new contact line), the two contact line families intersect with the meshing boundary line of the first envelope (reform). When the caries are processed, the tooth surface of the workpiece to be machined is the copy surface of the involute surface of the shaping wheel. Therefore, no new contact line should be formed, that is, the meshing limit line should be excluded from the tooth surface of the shaping wheel when trimming. This can be achieved by adjusting the angle of intersection Σ during shaping and machining.
The caries processing can be divided into two cases: 1 the gear ratio and the center distance are the same as those in the shape modification, that is, the basic geometric parameters (including the number of teeth) of the workpiece to be removed and the shape of the wheel are the same; 2 gear ratio and center distance and shape modification The difference is that the number of teeth of the workpiece and the shaping roller are different. In the first case, after the new contact line is removed, the tooth surface of the workpiece should be the replicated surface of the tooth surface of the shaping roller, so that a completely accurate tooth shape can be obtained theoretically; in the second case, the shaping roller is The number of teeth of the workpiece is generally not much different. The shortest distance between the two shafts during machining (ie, the center distance) is slightly different from that during the modification. Therefore, the tooth surface of the workpiece that is twice encased will no longer be divided into the original contact surface and the new contact. surface. Since this processing is more common, the versatility of the shaping roller and the honing wheel can be increased, and the number of shaping rollers can be reduced. Trial cutting is required during processing to determine if the machining accuracy requirements are met.
3 shape and caries test
The internal meshing process developed by Fassler in Switzerland in 1979 is one of the important methods for machining hardened gears. It has been widely used in the gear finishing of cars in developed countries such as the United States, Japan and Germany. According to the foreign data, the finished car gears processed by rolling (inserting) teeth → shaving → heat treatment → internal meshing process (or canceling the shaving process) can reach DIN 7-8. China's research on internal meshing dental caries technology is basically synchronized with foreign countries, but the application situation is not ideal. One of the main reasons is that the quality of the matching diamond shaping roller is not good, which affects the processing precision. At present, most of the gear manufacturers in China adopting the internal meshing process use Fassler's D-250-C internal meshing gear and Swiss Diava's diamond shaping roller, but its expensive price limits the process in China. Promotional application. In order to solve this problem, after years of research and development, we have successfully developed a gear-shaped diamond shaping roller, which has a manufacturing precision of 5 (GB10095-88), the quality is close to the advanced level of similar foreign products, and won the national level in 1996. New product certificate and National Torch Program project certificate.
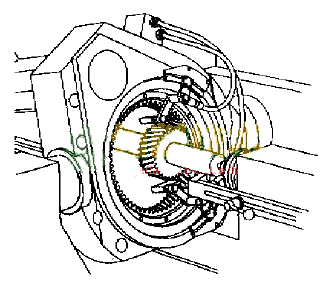
In order to verify the correcting precision of the self-made diamond shaping roller, the internal meshing toothing test was carried out on the D-250-C internal meshing gearing machine used by Dalian Machine Tool Plant. The processing device is shown in Fig. 1. Honing wheel parameters: mn=3mm, z=105, b=15°, B=40mm, a=20°, the base material is epoxy resin; gear test piece parameters: m=3mm, z=25, b=0° , B=25mm, a=20°, the material is 40Cr, it has been quenched after crushing the teeth; the diamond shaping roller: the geometric parameters are the same as the gear test piece, diamond-plated, particle size 120#.

Figure 1 Schematic diagram of internal meshing jaw machining

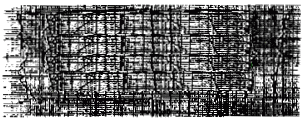
(a) before the caries 
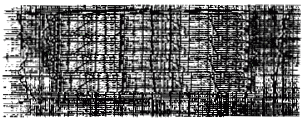
(b) after caries
Fig. 2 Comparison of the tooth profile of the test piece before and after the internal tooth
Next page
Vinyl Floor,Flooring Wood,Pvc Flooring Plank,Wood Pvc Flooring
DONGYANG MAOSHENG PLASTIC CO.,LTD , https://www.maoshengflooring.com